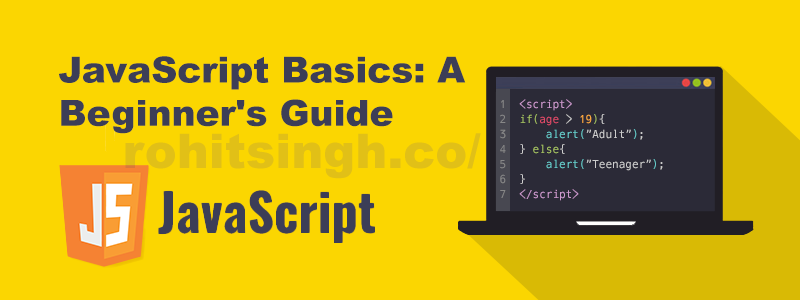
JavaScript Basics: A Beginner's Guide

 Learn the basics of JavaScript, including its history, uses, and development environment. This beginner's guide covers key concepts such as variables, data types, operators, control structures, functions, objects, arrays, and DOM manipulation. Start building your own web applications today with this comprehensive introduction to JavaScript.
JavaScript Basics: A Beginner's Guide
JavaScript is a powerful and widely-used programming language that plays a crucial role in the development of modern web applications. It was first introduced in 1995 and has since become a staple in the web development industry.
In this article, we will cover the basics of JavaScript and provide a comprehensive guide for beginners to get started with this popular programming language. We will cover topics such as setting up a development environment, variables and data types, operators and control structures, functions, objects, arrays, and DOM manipulation.
By the end of this article, you will have a solid foundation in JavaScript and be well-equipped to build your own web applications. Let's get started!
What is JavaScript?
JavaScript is a programming language that was developed in the mid-1990s and is now used in almost all modern web browsers. It is a client-side scripting language, which means it is executed by the user's web browser rather than on a server. JavaScript is used to add interactivity and dynamic behavior to web pages, and is often used in conjunction with HTML (HyperText Markup Language) and CSS (Cascading Style Sheets) to create websites and web applications.
History of JavaScript
JavaScript was developed in 1995 by Netscape Communications Corporation as a way to add interactivity to web pages. It was initially called LiveScript, but was later renamed to JavaScript to capitalize on the popularity of Java, another programming language at the time. In 1996, JavaScript was standardized by the European Computer Manufacturers Association (ECMA) and is now maintained by the ECMA International organization.
Uses of JavaScript in Web Development
JavaScript has a wide range of uses in web development, including:
- Adding interactivity to web pages (e.g. form validation, image sliders)
- Creating web applications (e.g. games, chat rooms)
- Enhancing user experience (e.g. smooth scrolling, responsive design)
- Connecting to APIs and databases (e.g. Google Maps, AJAX)
Setting up a JavaScript Development Environment
Installing a Text Editor
Before you can start writing JavaScript code, you'll need a text editor to type it in. There are many options available, ranging from simple, lightweight editors like Notepad++ to more fully-featured IDEs like Visual Studio Code. When choosing a text editor, consider factors like your personal preferences, the size and complexity of your projects, and any specific features you may need (e.g. code completion, debugging tools, etc.). Some popular text editors for JavaScript development include:
Once you've chosen a text editor, download and install it on your computer. Once it's installed, you can create a new file and start typing your code.
Setting up a Local Web Server
In order to test your JavaScript code in a web browser, you'll need to set up a local web server. This is a simple server that runs on your own computer and allows you to test your code locally, rather than uploading it to a live server. There are many options for setting up a local web server, including:
- Using a pre-configured development stack like XAMPP or WAMP
- Installing a standalone web server like Apache or NGINX
- Using a simple command-line tool like Python's built-in "http.server" module
Which option you choose will depend on your specific needs and preferences. For most beginner projects, a simple command-line tool like "http.server" will be sufficient. To use this method, open a terminal window and navigate to the directory where your JavaScript code is located. Then, run the command "python -m http.server 8000" (replace 8000 with the desired port number). This will start a local web server on your machine, which you can access by visiting "http://localhost:8000" in your web browser.
Debugging Tools and Resources
As you develop your JavaScript code, you'll inevitably encounter bugs and issues that need to be fixed. To help with this process, there are several tools and resources you can use to debug your code. One of the most powerful tools is the browser's developer console, which allows you to view error messages, inspect the DOM, and debug your code in real-time. To open the developer console in most browsers, simply right-click on the page and select "Inspect" or "Inspect Element". From the developer console, you can use the "console.log()" function to print values to the console for debugging purposes, and use the "debugger" keyword to set breakpoints in your code.
Other helpful resources for debugging JavaScript include:
- Online documentation and tutorials
- Stack Overflow and other online forums
- Debugging libraries and tools like JSHint and JSLint
By familiarizing yourself with these tools and resources, you'll be well-equipped to troubleshoot and fix any issues that arise in your JavaScript code.
Variables and Data Types
Declaring and Assigning Variables
In JavaScript, variables are used to store and manipulate data. To declare a variable, we use the keyword "var" followed by the name of the variable. For example:
var myVariable;We can also assign a value to the variable when declaring it by using the assignment operator (=). For example:
var myVariable = "Hello World!";Note that in modern versions of JavaScript (ES6+), we can also use the keywords "let" and "const" to declare variables. The difference between these keywords is that "let" allows the value of the variable to be reassigned, while "const" does not.
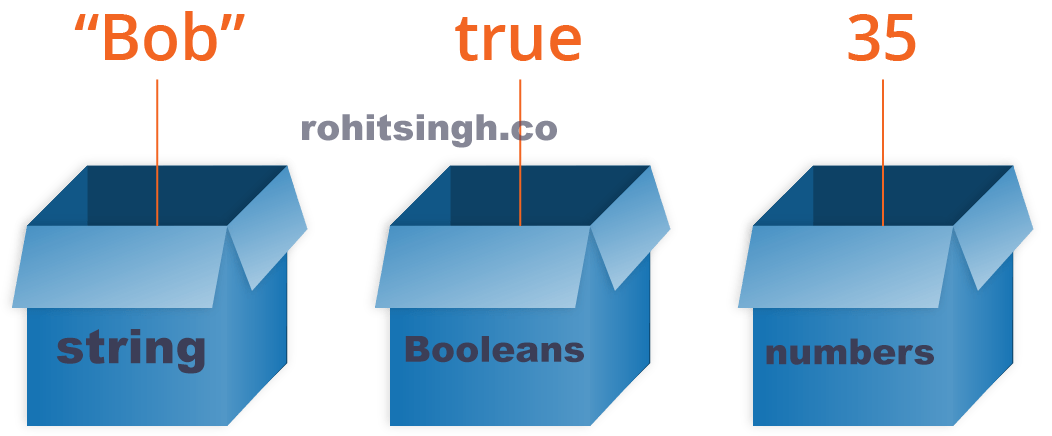
Data Types in JavaScript
In JavaScript, there are several data types that can be used to store different types of data. Some of the most common data types are:
- Strings: Strings are used to store sequences of characters, such as words or phrases. They are denoted by enclosing the characters in single or double quotes. For example:
var myString = "Hello World!";- Numbers: Numbers are used to store numeric values, both integers and floating point. There is no distinction between integers and floating-point numbers in JavaScript. For example:
var myNumber = 42;- Booleans: Booleans are used to represent true or false values. They are often used in control structures to determine whether a certain condition is met. For example:
var myBoolean = true;- Arrays: Arrays are used to store collections of data. They are denoted by enclosing a list of values in square brackets, with each value separated by a comma. For example:
var myArray = [1, 2, 3, 4, 5];- Objects: Objects are used to store key-value pairs of data. They are denoted by enclosing a list of key-value pairs in curly braces. For example:
var myObject = {name: "John", age: 30};Type Coercion
In JavaScript, type coercion refers to the automatic conversion of data from one type to another. This can sometimes lead to unexpected results if not handled properly. For example:
var myNumber = 42;

var myString = "42";

console.log(myNumber == myString); // Outputs: true

console.log(myNumber === myString); // Outputs: false
In the first comparison, the “==” operator performs type coercion by converting the string "42" to the number 42. Therefore, the two values are considered equal. In the second comparison, the “===” operator does not perform type coercion and only considers the values equal if they have the same type. It is generally considered best practice to use the “===” operator in comparisons to avoid any issues with type coercion.
Operators
Operators are special symbols in JavaScript that perform specific operations on one or more operands (values or variables). There are several types of operators in JavaScript, including arithmetic, comparison, and logical operators.
Basic Arithmetic Operators
Basic arithmetic operators include:
- Addition (+)
- Subtraction (-)
- Multiplication (*)
- Division (/)
- Modulus (remainder of a division) (%)
These operators perform basic arithmetic calculations on numeric operands. For example:
let x = 5;

let y = 3;

let z = x + y; // z will be 8

let a = x - y; // a will be 2

let b = x * y; // b will be 15

let c = x / y; // c will be 1.6666666666666667

let d = x % y; // d will be 2
Comparison Operators
Comparison operators are used to compare two values and return a boolean (true or false) result. Comparison operators include:
- Equal to (==)
- Not equal to (!=)
- Greater than (>)
- Less than (<)
- Greater than or equal to (>=)
- Less than or equal to (<=)
For example:
let x = 5;

let y = 3;

let z = "5";

console.log(x == y); // false

console.log(x != y); // true

console.log(x > y); // true

console.log(x < y); // false

console.log(x >= y); // true

console.log(x <= y); // false

console.log(x == z); // true
Logical Operators
Logical operators are used to perform logical operations on boolean values. Logical operators include:
- AND (&&)
- OR (||)
- NOT (!)
For example:
let x = true;

let y = false;

console.log(x && y); // false

console.log(x || y); // true

console.log(!x); // false
Control Structures
Control structures are used to control the flow of execution in a program. There are several types of control structures in JavaScript, including:
- if/else statements
- for loops
- while loops
if/else Statements
if/else statements are used to execute a block of code based on a boolean condition. If the condition is true, the code in the "if" block will be executed. If the condition is false, the code in the "else" block will be executed (if present).
For example:
let x = 5;

if (x > 0) {

console.log("x is positive");

} else {

console.log("x is not positive"); }

// Output: "x is positive"
For Loops
For loops are used to execute a block of code multiple times. The loop will continue to run as long as the specified condition is true.
For example:
for (let i = 0; i < 5; i++) { console.log(i); }

// Output: 0 1 2 3 4
While Loops
While loops are similar to for loops, but the loop will continue to run as long as the specified condition is true.
For example:
let i = 0;

while (i <= 5) {

console.log(i);

i++;

}
Functions
Functions are a crucial aspect of the JavaScript programming language. They allow developers to group pieces of code together and execute them whenever needed. In this post, we'll cover the basics of functions in JavaScript, including how to declare and call them, work with function parameters and arguments, use return statements, and utilize arrow functions.
Declaring and Calling Functions
To create a function in JavaScript, you can use the function keyword followed by the name of the function and a pair of parentheses. For example:
function greet() {

console.log("Hello, World!");

 }
To call a function, you simply need to write the function name followed by a set of parentheses. For example:
greet(); // Output: "Hello, World!"Function Parameters and Arguments
When declaring a function, you can include parameters within the parentheses. These parameters act as placeholders for values that will be passed to the function when it is called. For example:
function greet(name) { console.log(Hello, ${name}!); }When calling this function, you can pass an argument to the function by writing it within the parentheses. The argument will be used in place of the parameter. For example:
greet("John"); // Output: "Hello, John!"

greet("Jane"); // Output: "Hello, Jane!"
Return Statements
In addition to performing a specific action, functions can also return a value to the calling code. This is done using the return keyword. For example:
function add(x, y) { return x + y; }

console.log(add(2, 3)); // Output: 5
Arrow Functions
In modern versions of JavaScript (ES6+), you can use arrow functions as a shorthand way of declaring functions. Arrow functions are defined using the "fat arrow" (=>) syntax. For example:
const greet = name => console.log(Hello, ${name}!);

greet("John"); // Output: "Hello, John!"
What are Arrays?
A JavaScript array is a special type of object that is used to store multiple values in a single variable. Arrays can store any data type, including numbers, strings, booleans, and even other objects. Arrays are a useful data structure for storing and manipulating large collections of data.
Declaring and Initializing Arrays
There are several ways to declare and initialize an array in JavaScript. The most common method is to use square brackets and comma-separated values:
let myArray = [1, 2, 3, 4, 5];You can also use the Array constructor to create an array:
let myArray = new Array(1, 2, 3, 4, 5);You can also use an array literal to create an empty array and then add elements to it later:
let myArray = [];

myArray[0] = 1;

myArray[1] = 2;
Accessing and Modifying Array Elements
Once you have an array, you can access and modify its elements using their index numbers. The first element in the array has an index of 0, the second element has an index of 1, and so on.
To access an element in the array, you can use square brackets and the index number:
let myArray = [1, 2, 3, 4, 5];

console.log(myArray[2]); // Outputs 3
To modify an element in the array, you can use the assignment operator:
let myArray = [1, 2, 3, 4, 5];

myArray[3] = 6; // Modifies the fourth element in the array to be 6
Array Methods
JavaScript provides several built-in methods for working with arrays. Some common array methods include:
- push: adds an element to the end of the array
- pop: removes the last element from the array
- shift: removes the first element from the array
- unshift: adds an element to the beginning of the array
- slice: extracts a section of the array and returns it as a new array
- splice: removes and/or replaces elements in the array
- indexOf: returns the index of the first occurrence of an element in the array
- join: converts the elements of the array to a string and returns it
Here is an example of using some of these methods:
let numbers = [1, 2, 3, 4, 5];

numbers.push(6, 7); // Adds 6 and 7 to the end of the array

console.log(numbers); // Outputs [1, 2, 3, 4, 5, 6, 7]

numbers.pop(); // Removes the last element (7) from the array

console.log(numbers); // Outputs [1, 2, 3, 4, 5, 6]

numbers.shift(); // Removes the first element (1) from the array

console.log(numbers); // Outputs [2, 3, 4, 5, 6]

numbers.unshift(-1, 0); // Adds -1 and 0 to the beginning of the array

console.log(numbers); // Outputs [-1, 0, 2, 3, 4, 5, 6]

let slice = numbers.slice(2, 5); // Gets a new array with elements at index 2, 3, and 4

console.log(slice); // Outputs [2, 3, 4]
Document Object Model (DOM)
The Document Object Model, or DOM, is a programming interface that allows developers to manipulate the content and structure of web pages. DOM manipulation is a crucial aspect of web development, as it allows us to dynamically change the appearance and behaviour of web pages in response to user input or other events. In this article, we'll explore the basics of DOM manipulation in JavaScript, including how to access and modify DOM elements, and how to work with event listeners and handlers.
What is the Document Object Model (DOM)?
The DOM is a tree-like structure that represents the content and structure of a web page. It consists of a series of nodes, each of which represents a different type of element on the page (such as a paragraph, a list, or a form). By using the DOM, developers can access and modify these elements in real-time, allowing them to create dynamic, interactive web applications.
Accessing and Modifying DOM Elements:
To manipulate the DOM, we first need to be able to access the elements we want to modify. There are several ways to do this in JavaScript, including:
getElementById: This method allows us to access an element by its unique id attribute. For example, if we have an element with an id of "myDiv", we can access it with document.getElementById("myDiv").
getElementsByTagName: This method allows us to access a group of elements by their tag name. For example, if we want to access all of the paragraphs on a page, we can use document.getElementsByTagName("p").
querySelector and querySelectorAll: These methods allow us to access elements using CSS-style selectors. For example, if we want to access the first paragraph on a page, we can use document.querySelector("p").
Once we have accessed an element, we can modify it by changing its attributes or content. For example, we can change the text of a paragraph by setting the innerHTML property, or we can change the src attribute of an image to change the image that is displayed.
Event Listeners and Handlers:
Event listeners are a way for us to specify code that should be executed when a specific event occurs on an element. For example, we can use an event listener to specify that a function should be called when a button is clicked, or when a form is submitted.
To create an event listener, we use the addEventListener method, which takes two arguments: the type of event to listen for, and a function to be called when the event occurs. For example:
document.getElementById("myButton").addEventListener("click", myFunction);In this example, the "click" event is being listened for on the element with an id of "myButton", and the function "myFunction" will be called whenever the event occurs.
Conclusion
In this article, we covered the basics of JavaScript, including its history, uses, and development environment. We also explored key concepts such as variables and data types, operators and control structures, functions, objects, arrays, and DOM manipulation.
By now, you should have a solid foundation in JavaScript and be able to start building your own web applications. However, this is just the beginning of your journey as a JavaScript developer. There is still much more to learn, including advanced concepts such as asynchronous programming, object-oriented programming, and web performance optimization.
To continue your learning, we recommend the following resources:
- Codecademy's JavaScript course: Codecademy
- MDN's JavaScript Guide: MDN
Table of Contents

Related Posts